Stylish Light Effect in Photoshop ( Tutorial & Psd File )
 10:08
10:08
 hatizix

Step 1
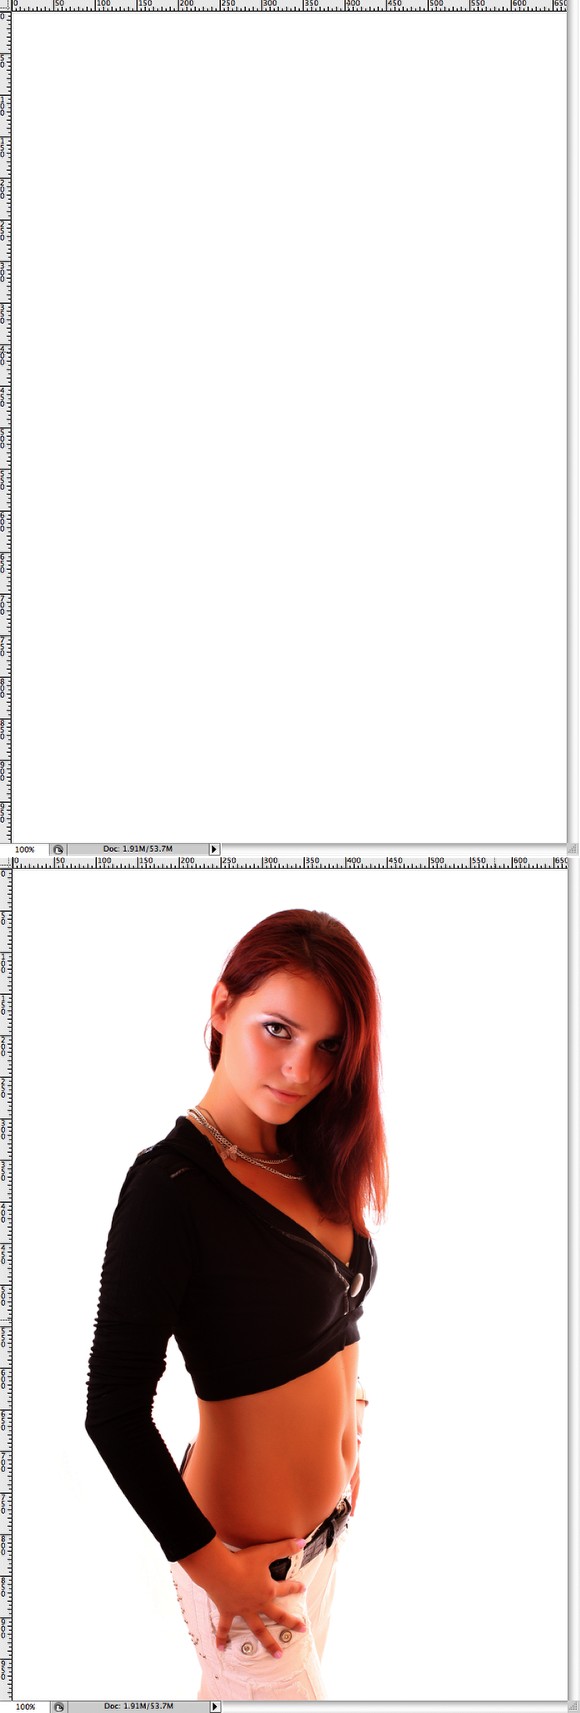
Open Photoshop and create a new document. After that import a photo to your document, the one I used is courtesy of Shutterstock and you can donwload it here.
Step 2
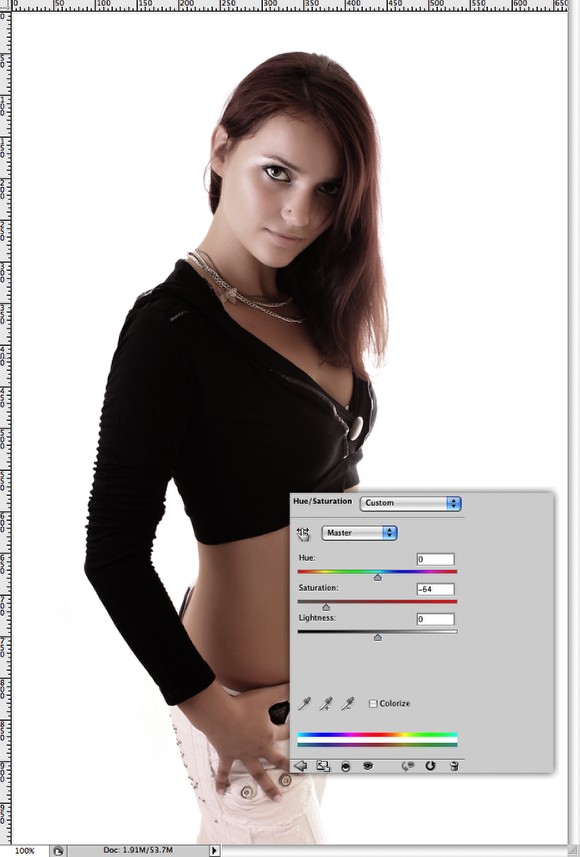
Go to Image>Adjustemtns>Hue and Saturation. Reduce the Saturation to -65.
Step 3
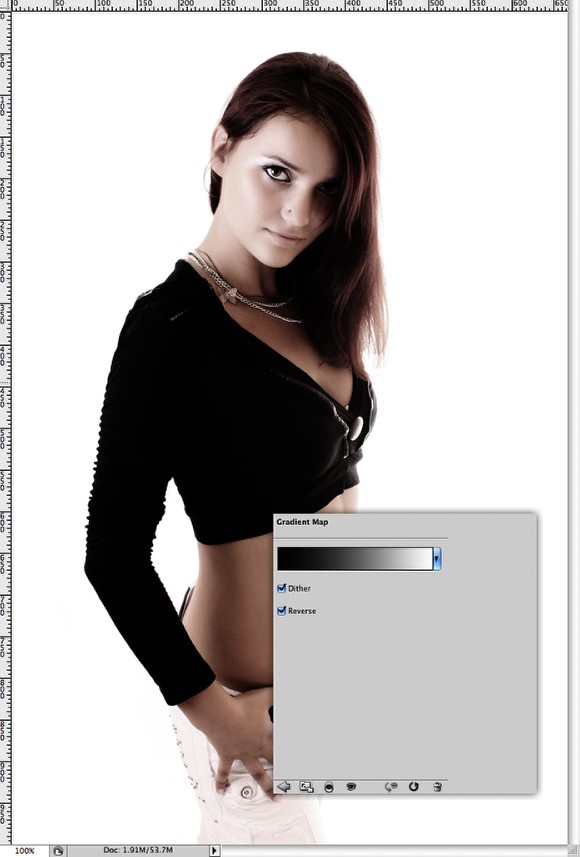
Now go to Layer>New Adjustment Layer>Gradient Map. Use Black and White for the colors and selectDither and Reverse. After that change the Blend Mode to Soft Light.
Step 4
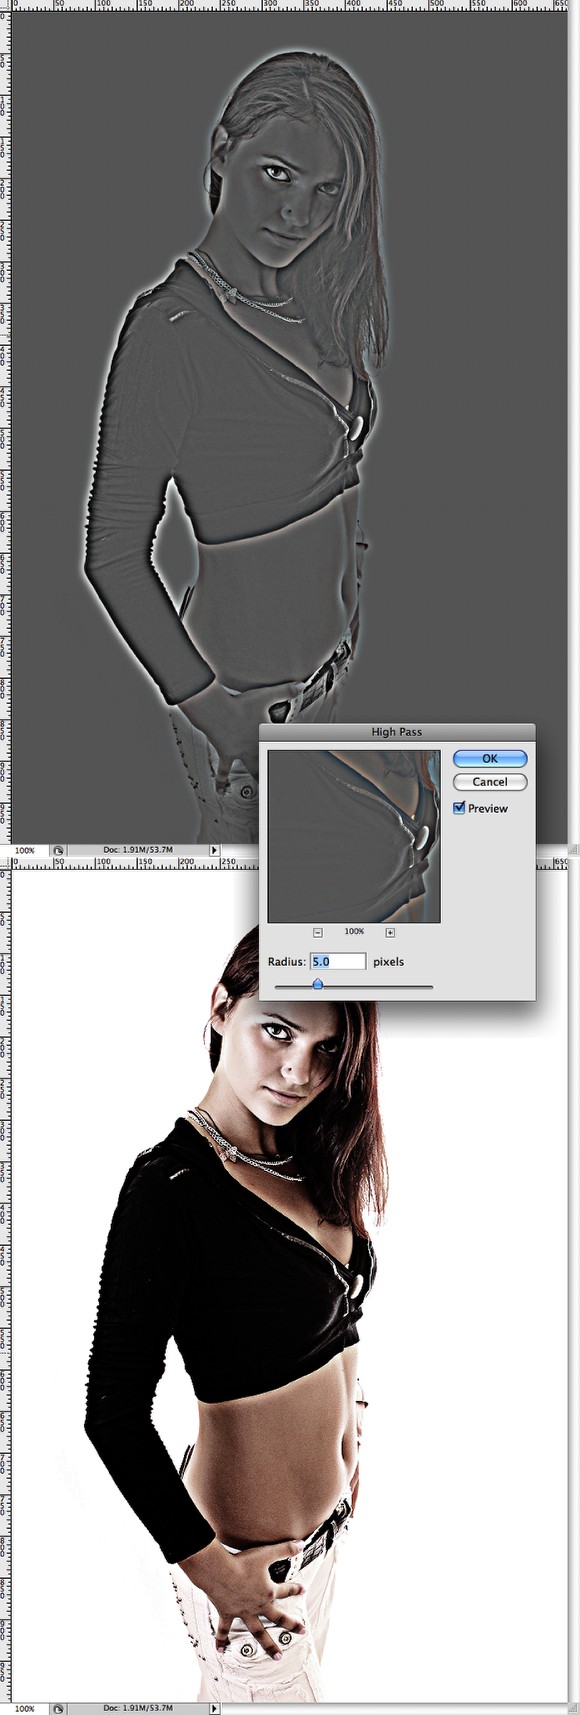
Duplicate the layer of the girl, this new layer will be on top of the original girl layer. Go to Filter>Other>High Pass. User 5 pixels for the Radius and press OK. After that change the Blend Mode to Hard Light.
Step 5
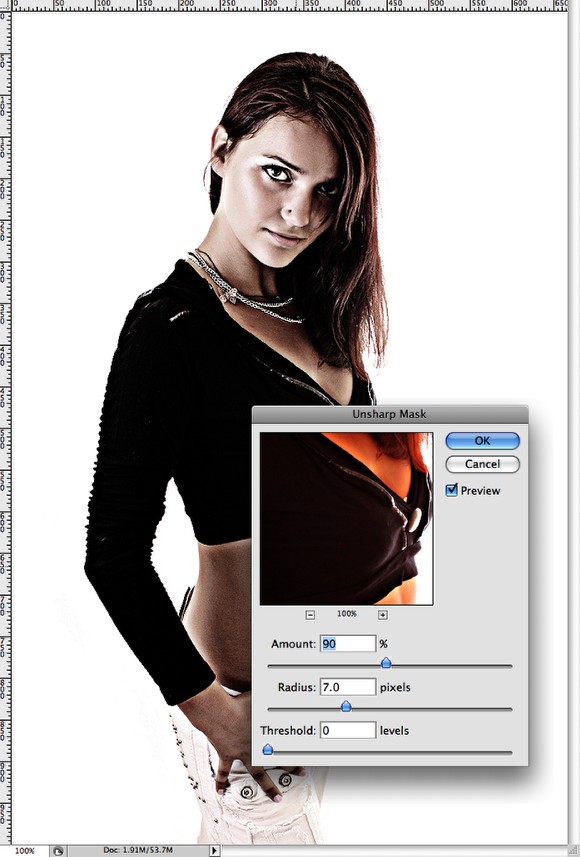
Select the layer girl and go to Filter>Sharpen>Unsharp Mask. Use 90% for the Amount, 7 for the Radius and 0 for the Threshold.
Step 6
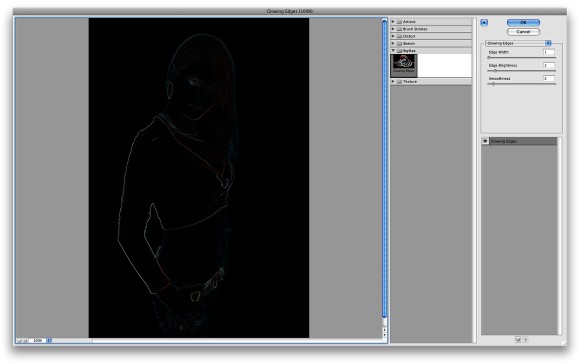
Duplicate the girl layer again and put it on top of the other layers. Go to Filter>Stylize>Glowing Edges. Use1 for the Edge Width, 2 for the Edge Brightness and 2 for the Smoothness.
Step 7
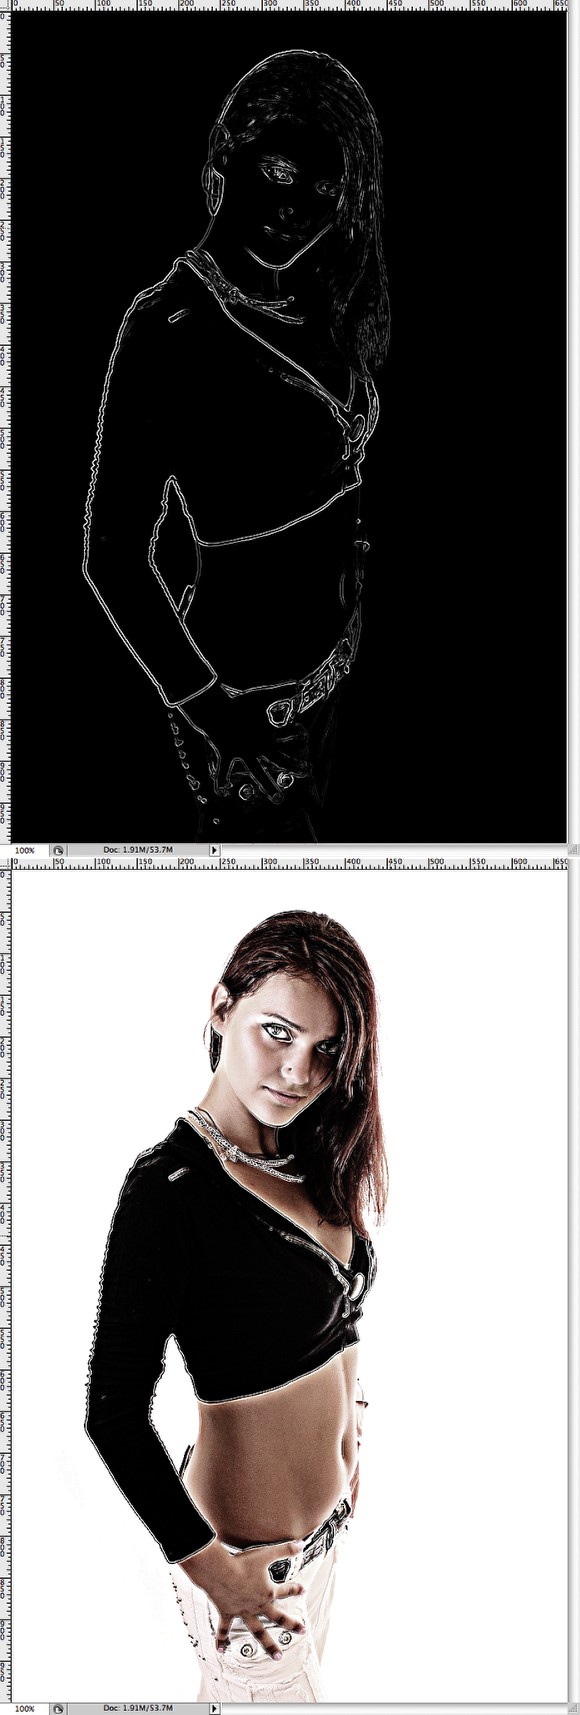
With the glowing edges layer selected, go to Image>Adjustments>Desaturate. You will have white lines now for the strokes, so just change the Blend Mode to Screen. Tip: You can make the lines stronger by going toImage>Adjustments>Levels and increasing the white input.
Step 8
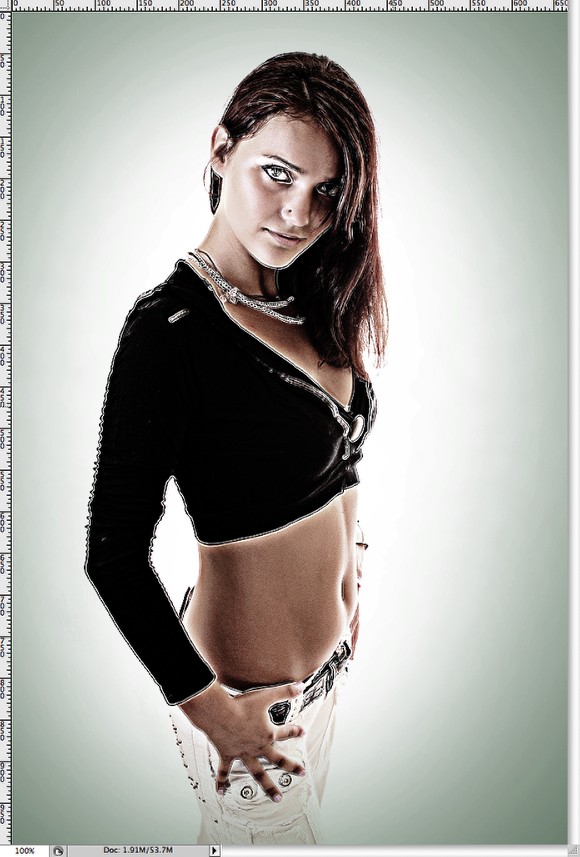
Create a layer on top of the others and with the Gradient Tool (G) use black and white for the colors andRadial for the Type to fill the layer with a gradient. Change the Blend Mode to Multiply and reduce the opacity until you get a very subtle gradient effect. Use the image below for reference.
Step 9
To create the first light effect I will use a photo of a star, you can download it here. Copy just the part of the photo you want and paste it in the document. After that change the Blend Mode to Screen so what is black will be totally transparent. You will have a nice light effect over her shoulder.
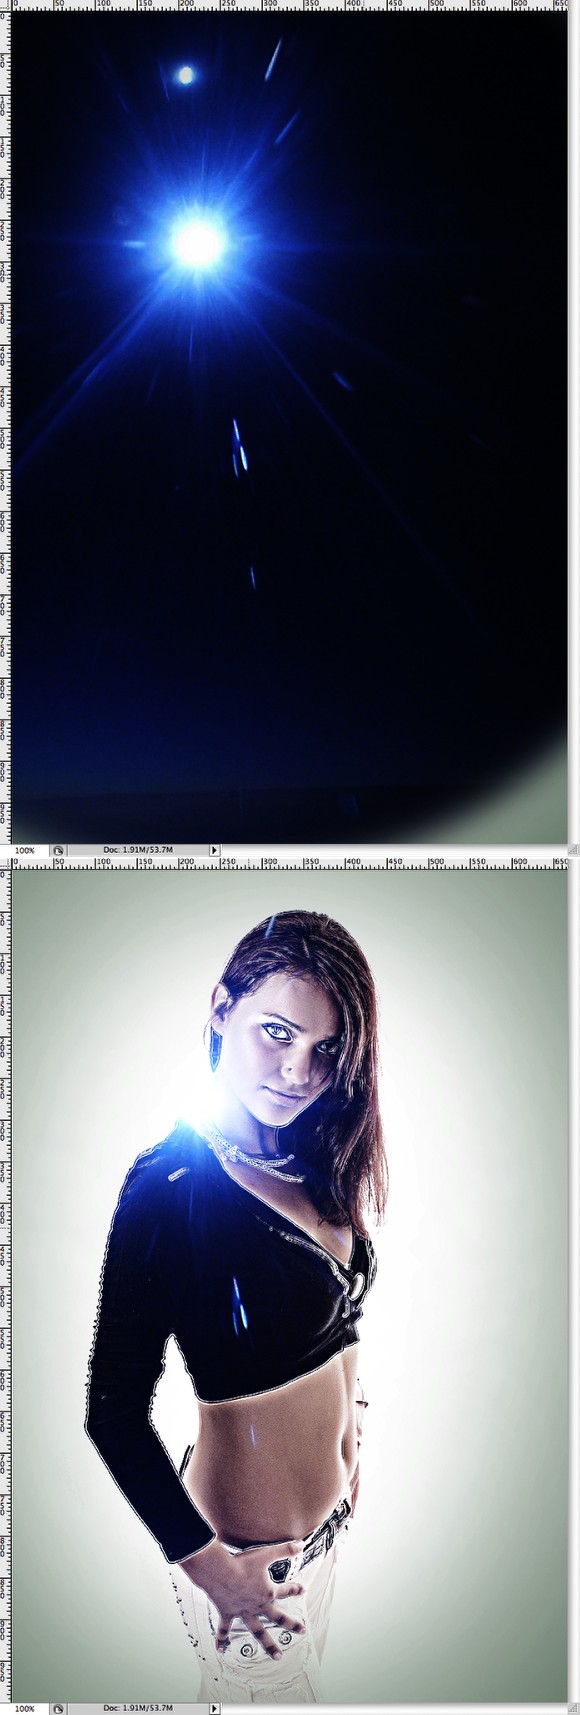
Step 10
Go to Image>Adjustments>Hue and Saturation. Select Colorize and then move the Hue until you get a nice pink color, I used 300 for the Hue and 50 for the Saturation.
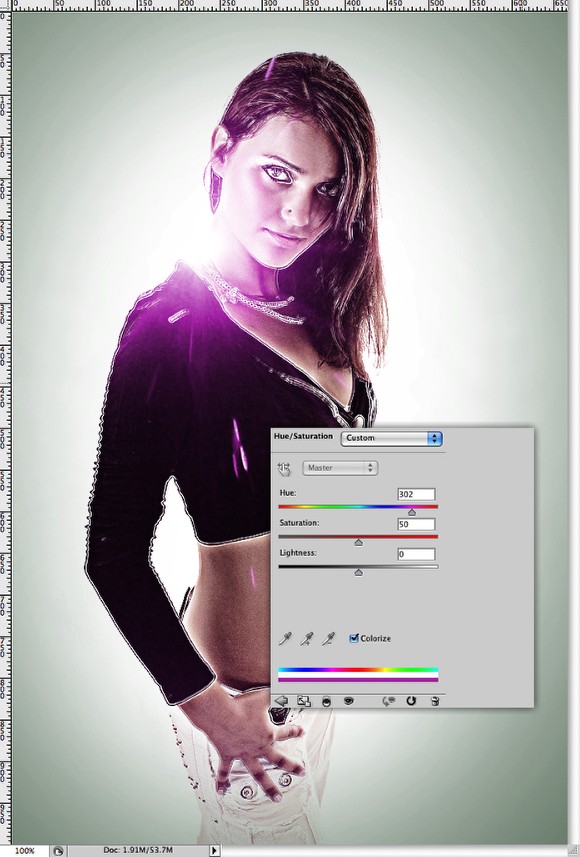
Step 11
Create a and with the Brush Tool (B) and a very soft round brush select a light blue for the color and paint a spot of blue light (1). Add another layer and again with the Brush Tool (B) and the same brush, just select a green for the color and paint another spot of light (2). Change the Blend Mode of these 2 layers to Screen.
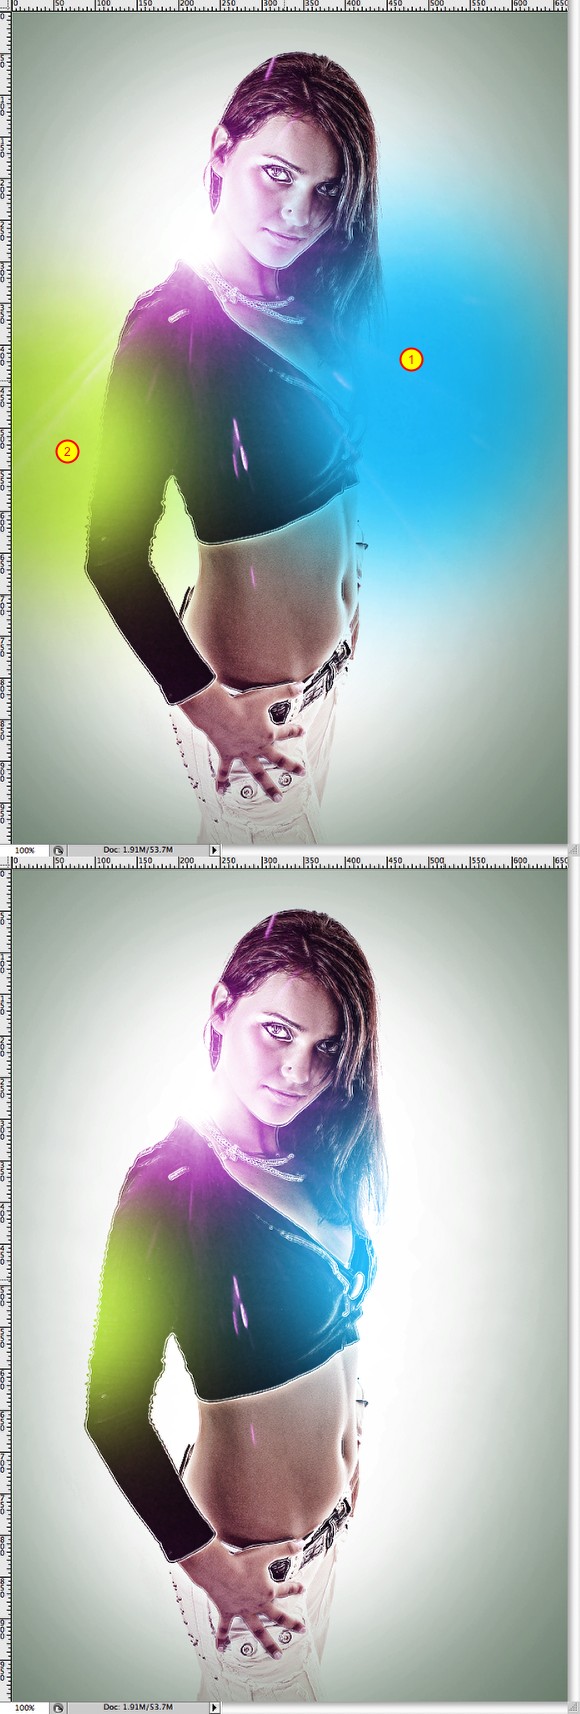
Step 12
I wanted to add some nice effects like particles coming off of her body. To do that I create an explosion in Cinema 4D, it's very simple but I won't get in details this time. You can download the image I used here.
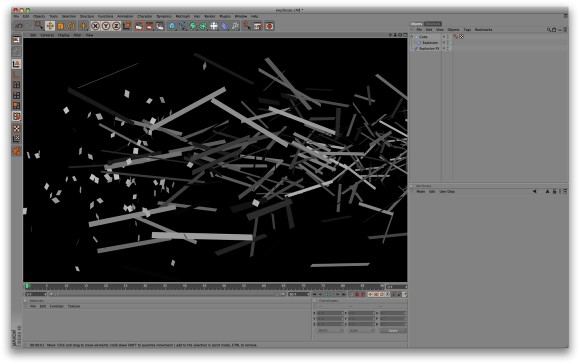
Step 13
Import the image in Photoshop and place it in your document. After that go to Image>Adjustments>Invert. That way you will get black particles instead of white. Then just change the Blend Mode to Multiply in order to make what is white become transparent. Move this first image to her back like the image below.
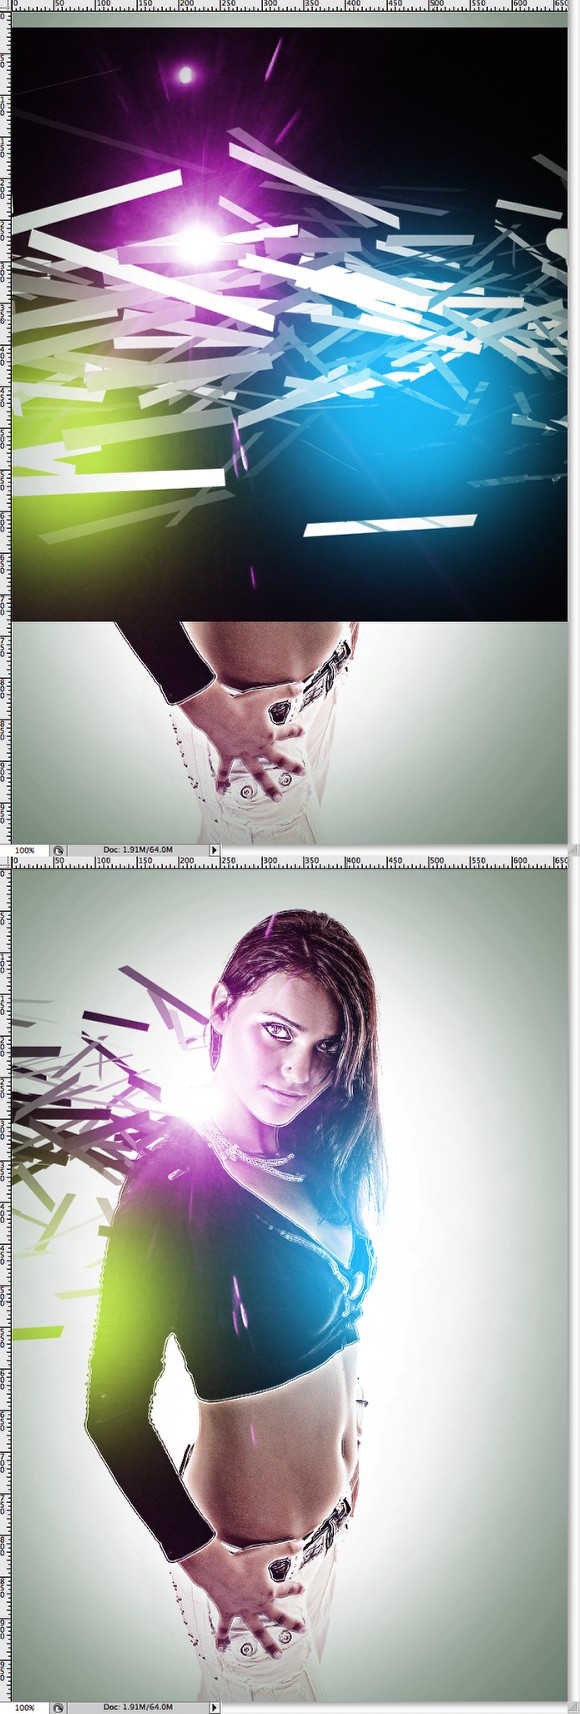
Step 14
Use again the same image but resize it a little bit and rotate it. It's very important to place both images trying to make it match the black areas of the girls blouse.
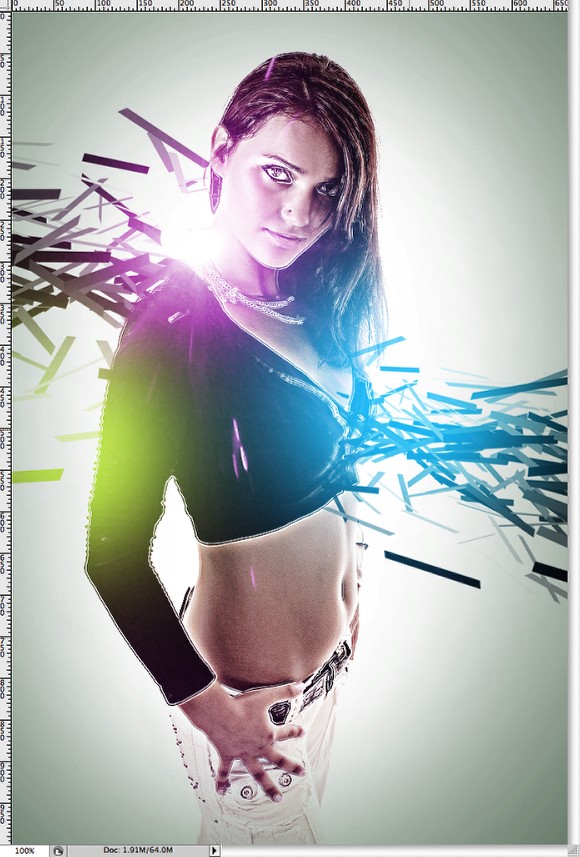
Step 15
With the Eraser Tool (E) use a very small brush and delete some areas to make the edges of the girl less uniform on those areas that there are the particles.
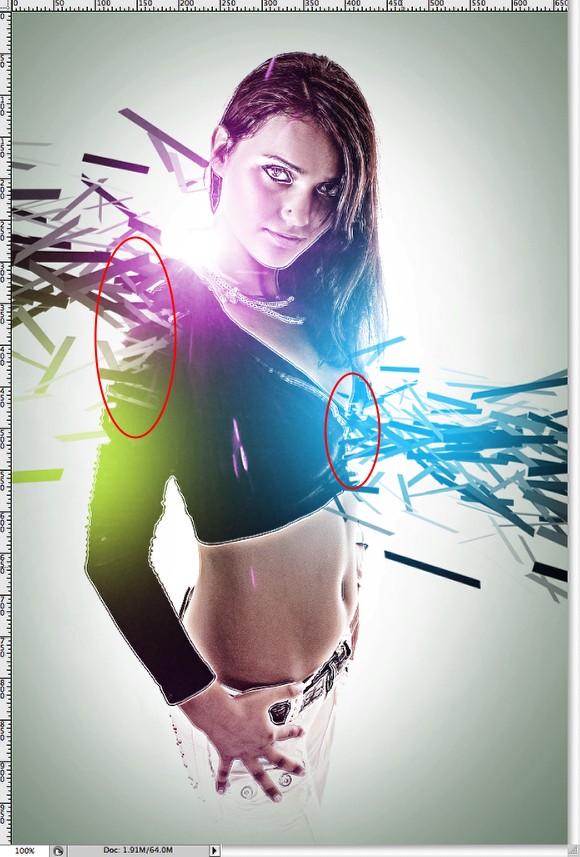
Step 16
Now just place a nice texture on top of the other layers, I'm using a concrete texture courtesy of Shutterstock. You can donwload it here. Also you can add more elements like a milk splash I added on her leg.

 Download Photoshop File
Author: Abduzeedo'S
You can leave a response, or trackback from your own site.


0 Response to "Stylish Light Effect in Photoshop ( Tutorial & Psd File )"
Enregistrer un commentaire