How to Create Stunning and Bold 3D Text ( Tutorial Photoshop & Illustrator )
 10:17
10:17
 hatizix

Before we start
We will need some a couple of free stock images. Download the following images.
Creating the text in Illustrator
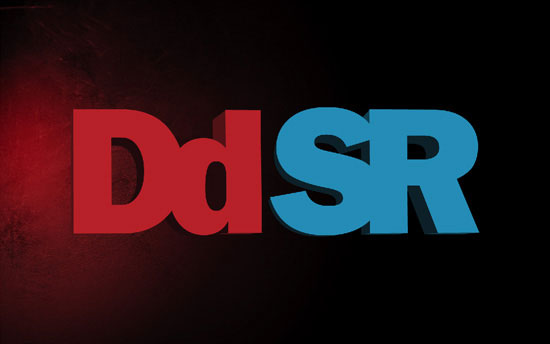
1 We are going to start off by creating our 3D text object into a new Illustrator document; create a new document by choosing File > New (Ctrl+N). Use the Type Tool (T) to add the text into the canvas: type the text "DdSR".
2 Next, highlight the text "Dd" and change the color to #CC3333. Highlight the text "SR" and change the color to #00A0C6.

Adding a 3D Extrude & Bevel Effect
3 Now that we have our 3D text in order, we are going to apply a 3D effect. We are going to create an object that will be resting on a flat surface, so we are going to give it some subtle angles. To start, choose the Selection Tool (V) and click on our text to select it.
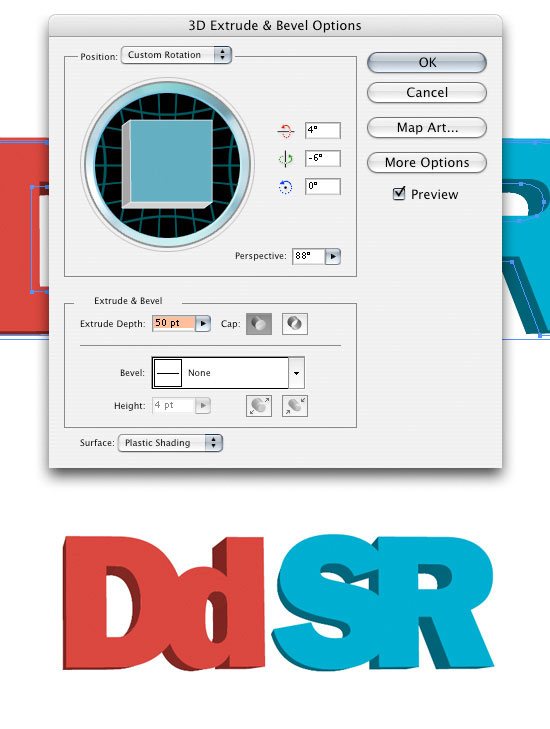
4 Then, choose Effect > 3D > Extrude & Bevel to open up the 3D Extrude & Bevel dialog box. Use the settings shown in the following figure to create the effect you need.
Expanding the 3D object
5 Choose Object > Expand Appearance to turn our 3D object into vector points and lines so that we can bring it into our Photoshop document one piece at a time.
Preparing the 3D object for transferring into Photoshop
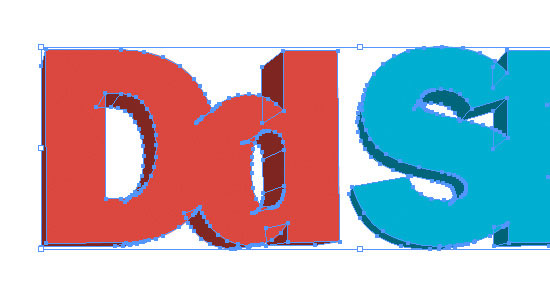
6 For a little preparation, we are going to adjust the colors of the sides of our 3D text. First, we need to figure out where the light is going to come from. For our composition, we are going to have two light sources coming from the left of the "Dd" and from the right of the "SR". To begin, we need to ungroup the 3D text object, and the first step to doing so is by using the Selection Tool (V) to select our 3D text.
7 Next, choose Object > Ungroup (Ctrl+Shift+G) to start ungrouping the 3D text vectors. Do this a bunch of times (use the keyboard shortcut to make this process easier) to make sure nothing is grouped still. Tweak the colors of the 3D text object pieces so that it looks like the following figure, choose colors that are lighter and darker than the 3D text face.

8 Open up Photoshop and create a new document (Ctrl+N). The size of the document doesn’t really matter because you can adjust the size of the 3D text object. For this tutorial, I am going to create a document with the canvas size set to 1680px x1050px.
9 Use the Selection Tool (V) to select all the pieces of the 3D text object in Illustrator. Before copying and pasting it into Photoshop – select the 3D text object entirely and adjust its size. Once you get the size you want, bring everything into Photoshop. Select the 3D text object, choose Edit > Copy (Ctrl+C), go over to Photoshop, and choose Edit > Paste (Ctrl+V).

Changing the Hue/Saturation of the Layer
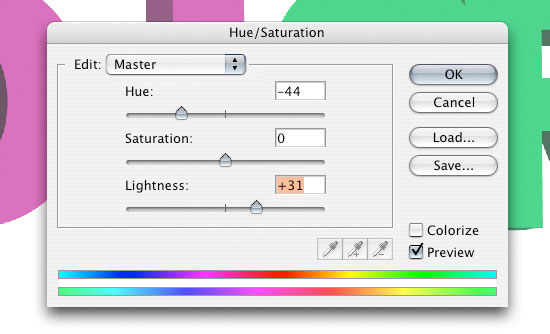
10 We are going to use this 3D text object as a template so we know where everything goes. To make it easier to see the difference between our template and the pieces coming in from Illustrator, we are going to change the hue and brightness of the layer. To do this, choose Image > Adjustments > Hue/Saturation (Ctrl+U). The color you select doesn’t really matter; just make sure there is a good contrast between this template and the pieces we are going to bring in.
Bringing the 3D text pieces to Photoshop
11 Now, we can start bringing in the pieces from Illustrator one by one. They should fit in pretty well, but there were a couple that I had to adjust; you can do that by using the Free Transform Tool (Ctrl+T).

Adding the background glow
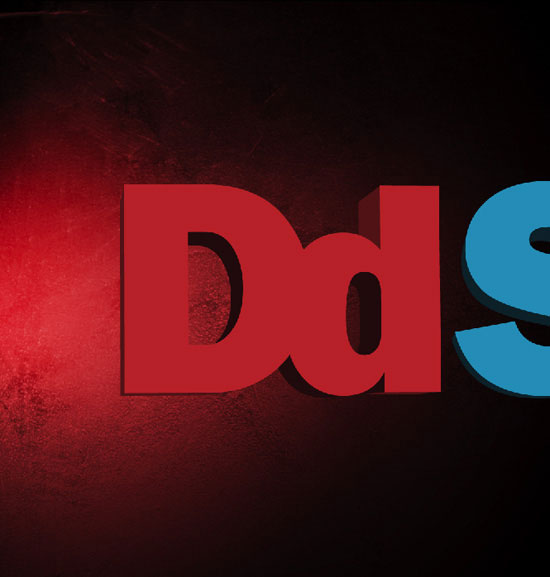
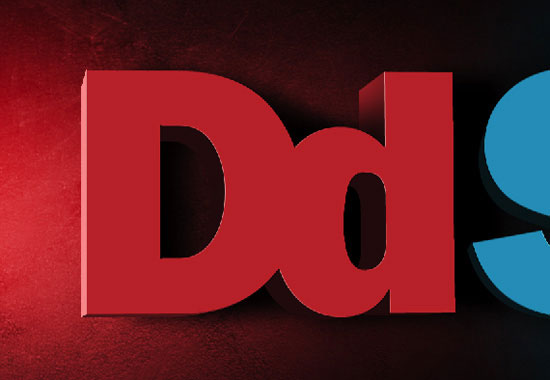
12 We are now going to start adding the background glow behind the "Dd". First, create a new layer below the other layers thus far.
13 Choose the Gradient Tool (G) from the Tools Panel and then set the gradient type in the Options bar to Radial Gradient. Change the Foreground color to #CC3333 and make a small gradient in the middle of the page. Resize the gradient so it fills the left side of the canvas, you can do so by choosing Edit > Free Transform (Ctrl+T). We do this so that we can adjust the gradient without having it cut off, which would happen if you made it large the first time. See the following figure for reference.

Incorporating the stock textures to the design
14 Let’s bring in this texture from Flickr (teXture 005 – Faux Paint). Resize the texture so that it covers the whole area on the left half of our canvas. Change the Blend Mode to Overlay.
15 To give a little more of a red light, we are going to duplicate the red gradient layer. To do this, change the Blend Mode to Normal and drop the opacity to 30%. Move our new gradient over so it is behind the "Dd" by using the Move Tool (V).
16 Next, we are going to make another Radial Gradient like we did in a previous step, but this time we are going to be using white (#FFFFFF) as our Foreground color. The gradient is going to go on the left side of the canvas like the first red one did.
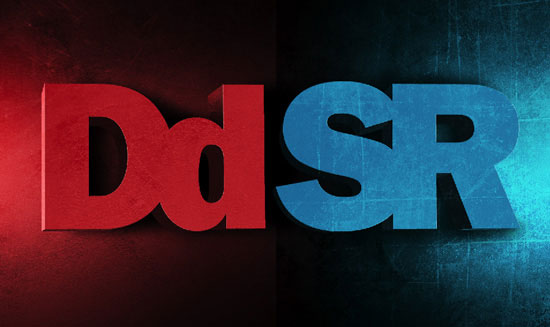
Repeating previous steps for the "SR" text
17 Now we are going to repeat Steps 12-16 for the "SR" text. We are also going to use a different texture, the second texture you downloaded earlier from Texture Lovers (Brown Stained Concrete #7) – and instead of the red, we are going to use blue (#0099CC) for the glow. Play around with the opacity of the gradient layers until you get something you like.

Adding a Bevel & Emboss Effect
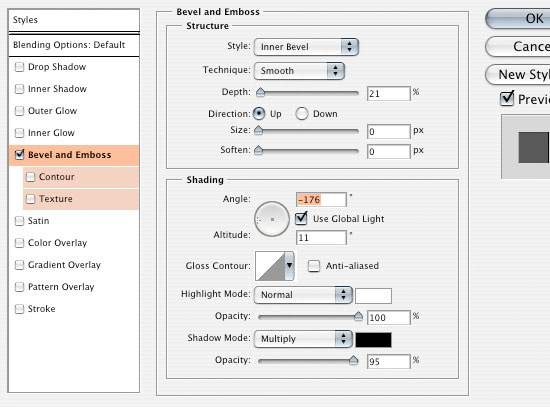
18 Now we are going to add a Bevel and Emboss effect to our 3D text object. This is going to be a little tricky because we have two light sources and if we try to change the light source for the second lighting, it will automatically change both. To fix this, we are first going to add a bevel to the "SR" face. To start, select the layer with the "SR" face. Then, click on the Add a layer style icon at the bottom of the Layers Panel, and choose Bevel and Emboss. Use the following settings as shown in the following figure.

Merging a couple of layers
19 We are now going to flatten the image that we just added the Bevel and Emboss layer style to. To do this, we are going to create a new layer and then link the new layer with our "SR" face layer. To link the layers, select both layers in the Layers Panel by holding down Ctrl and clicking on them, then click on Link layers icon at the bottom of the Layers Panel (or right-click on the selected layers, and choose Link Layers in the contextual menu).
20 Then merge the linked layers into one layer by choosing Layers > Merge Layers (Ctrl+E). Now we have one flattened layer with the "SR" face with a bevel on it.
21 Lets go ahead and add a bevel on our "Dd" face using the same techniques above, but this time, use the Bevel and Emboss layer style settings shown in the figure below.
Adding some shadows
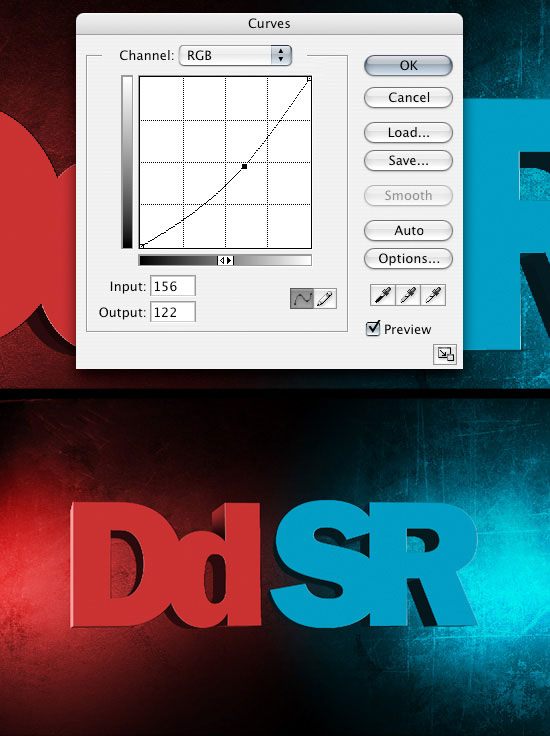
22 Now we are going to add some shadows to the sides of our logo. To do this, we want to click on each edge pieces’ layer that would be a shadowed area and adjust the Curves for each one by choosing Image > Adjustments > Curves (Ctrl+M) to open up the Curves dialog box.
23 We also want to add a shadow on half of the top of our letter "d" because the light would be hitting some of it. Click on the edge layer for the top of the "d" to make it the active layer, then Ctrl + click on the layer’s thumbnail to create a selection around the edge layer.
24 Choose the Gradient Tool (G) from the Tools Panel, and set the gradient style to aBlack to 0% opacity and Linear Gradient, in the Options bar. Click and drag a gradient so that you get something like what I have in the subsequent figure. Repeat this with the "SR" text.
25 To get the shadow behind the logos, create a selection around the "SR" text by holding down the Ctrl key and clicking on all the SR texts’ layer thumbnails; keep clicking and adding to the marquee selection until "SR" has been outlined. Create a new layer and fill it with black (#000000).
26 Now we want to give the black logo a blur to give it more of a shadow look, so go to Filter > Blur> Gaussian Blur and give it a 25px blur. Switch to the Move Tool (V), hold down the Shift key, and move it over to the left using your arrow keys, about 2 spaces.

Tweaking the shadows
27 Now we have to do a little fixing of the shadow. There are some parts that have a shadow that don’t need it, like the right side of the "SR" logo. To start, add a layer mask to the shadow layer by clicking on the Add layer mask icon at the bottom of the Layers Panel.
28 Click on the mask part of the layer. Choose the Brush Tool (B) from the Tools Panel. Use a black (#000000) brush at with a Brush diameter of 100px and 0%hardness to paint away the areas we don’t want. Check out the figure below to see how the shadow should look like.
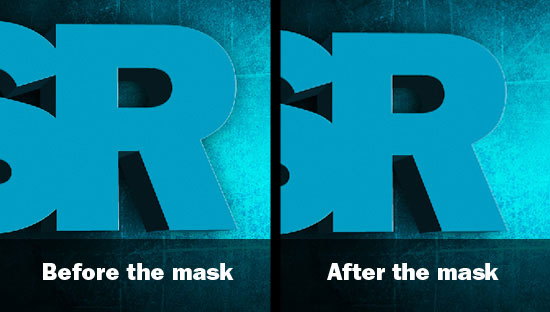
29 There are also some areas that we want to add some shadows to. For this, we want to click back onto the shadow layer, and using our black brush at 100px, 0%hardness, and 20% opacity, paint the areas we want to darken.

30 Repeat Steps 25-29 for the "Dd" text.
Adding some textures to the text
31 Now we are going to add some texture to our logos. First, let’s duplicate the texture that we used for the background on the left side and move the layer to the very top.
32 Ctrl + click on all the "Dd" layers (the face and the edges) and then click on theAdd layer mask icon at the bottom of the Layers Panel to add a layer mask on top of them. This will get rid of everything except for the area on the "Dd".

33 Now, repeat the previous steps for the "SR" text. The only thing I changed the Blend Mode from Overlay to Soft Light because the texture was too harsh/bold for my liking.
Adding lighting and shadows to the text faces
34 Now we are going to add some lighting and shadows to logo faces. First, we are going to add a shadow to the "Dd". Ctrl + click on the "Dd" face layer. Using a Gradient Tool (G) with Linear Gradient gradient type, click and drag on the canvas to create a gradient towards the light until you get something you like. Repeat with the "SR" text face.
35 We are going to create more gradients, similar to what we did in the previous step. This time though, the gradients are going to be red on the blue text and blue on the red text to get the reflection of the light coming from the opposite sides. To start, Ctrl + click on the "SR" layer.
36 Use a Linear Gradient with #CC3333 as your Foreground color. Click and drag on the canvas to create a gradient in such a way that it creates a subtle hint of red on it.
37 Change the Blend Mode to Hard Light.
38 Repeat this with the "Dd" text and a color of #0099CC.

Giving the text some highlights
39 Since we want to give the impression of a bright light coming from the edges of the document, we are going to add a highlight to each of the logos. To start, Ctrl + click on the "SR" face layer to create a selection around it. Using a White to 0% opacity Linear Gradient, click and drag a gradient until you get something you like. Change the Blend Mode to Overlay. Repeat this with the "Dd" logo.
Some final details
40 We are going to add some styles to the whole canvas to finish it off, so first we want to flatten the image. To do this, choose Layers > Flatten Image.

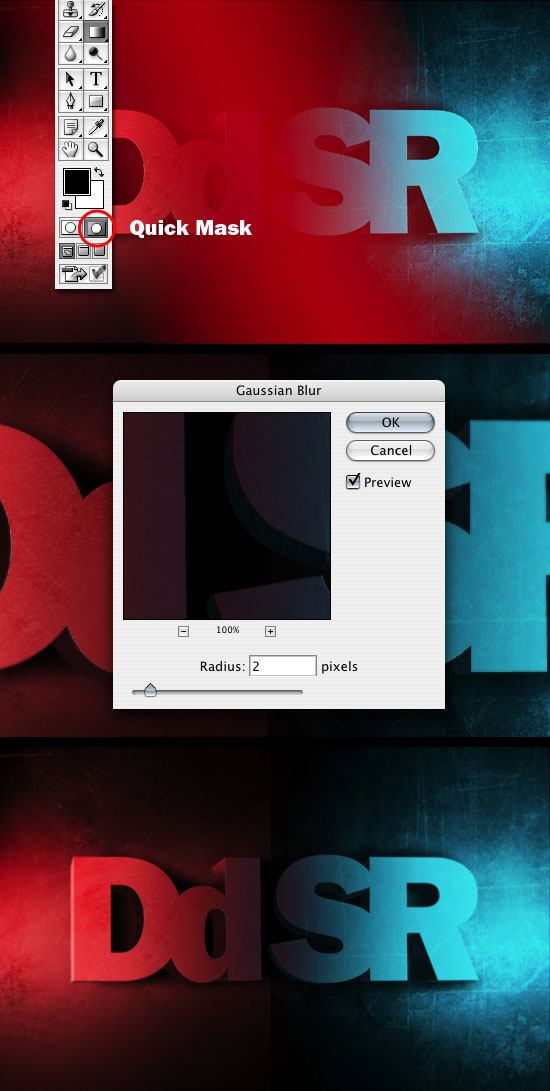
41 We are going to blur the bottom left and top right corners to give the image a little bit of dimension. To do this, we are going to click on the Quick Mask. To start, click on the Edit in Quick Mask Mode icon at the bottom of the Tools Panel, which is just below the foreground/background colors.
42 Click and drag a black Reflected Gradient in the middle of the canvas using the Gradient Tool (G). Click on the Standard Mode icon at the bottom of the Tools Panel to switch off Quick Mask mode; this will give you a selected area from the gradient that we just created. This should have selected the bottom left and top right corners, depending on your settings. If it selected the middle area, just create an inverse selection, Select > Inverse (Ctrl+Shift+I).
43 Go to Filter > Blur >Gaussian Blur and set the blur at 2px.
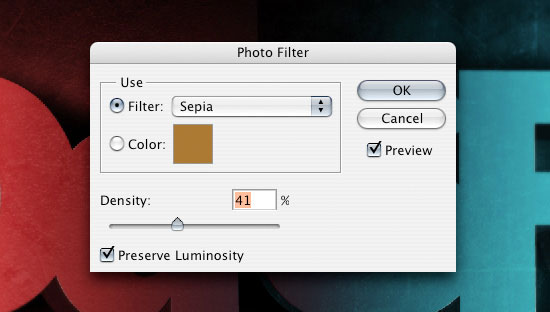
44 Finally, you can play around with some Photo Filters or other adjustment layers to get that look you want. You can do this by clicking on the Create new fill or adjustment layer icon at the bottom of the Layers Panel, and selecting Photo Filters(or any of the other adjustment layers).
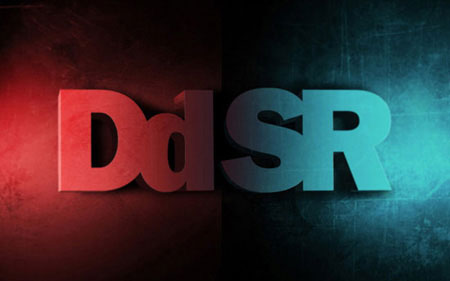
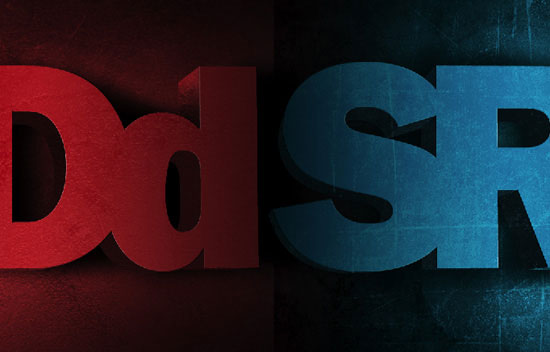
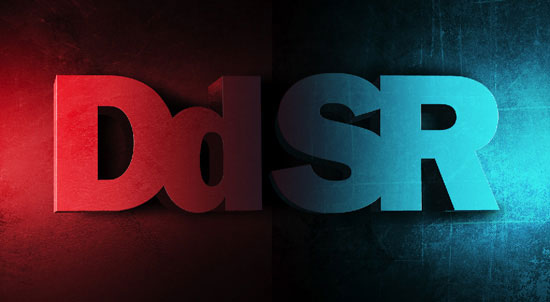
And you’re done!
If you followed along with me, you should have something that looks like the following figure.

Author : Tyler Denis

You can leave a response, or trackback from your own site.
0 Response to "How to Create Stunning and Bold 3D Text ( Tutorial Photoshop & Illustrator )"
Enregistrer un commentaire